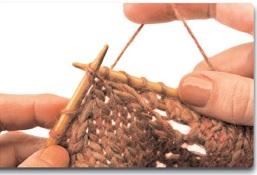
Throughout history, knitting has been a vital part of daily life. Nowadays, it’s more of a practical craft, and has become a great way for both men and women to relax, away from the stress of busy modern lifestyles. It has also enjoyed a bit of a recent revival, as many people are enjoying going back to basics, and creating their own garments to wear. Once you’ve learnt the most simple knitting stitches the world of knitting is your oyster. And you can start to learn more about the huge range of knitting stitches available at the end of your fingertips. Enabling you to create a wide variety of attractive, unusual, and handcrafted garments, gifts and things for the home.
The two most basic stitches all beginners start with are the knit stitch and the purl stitch. So, we plan to take a look at them both a little later. But first, let’s look at the real basics, casting on and casting off stitches. Without a good understanding of these you’ll struggle to enjoy the knitting experience.
 How to cast on and cast off
Casting on
This is usually the first step in any knitting pattern. It is basically how you put the yarn and the stitches on the needles. There are a few different ways, including backward loop cast on, long-tail cast on, and the provisional cast on. Let’s take a quick look at each one in turn. For more detailed instructions and helpful pictures take a look here.
- The backward loop cast – This is the best place to start if you’re a beginner. It’s one of the easiest ways to cast on. It does, however, have a downfall. It tends to leave edges that are jagged and uneven. The first step is to make a slipknot and slide it onto one of your knitting needles. Next, holding one needle in your hand, wrap the yarn over the index finger of your other hand. Now you have to bring the needle in front of your finger and the strand of yarn. Turn the needle so the tip faces your fingertip, and slip it under the yarn. Pull your finger out and gently tug on both strands of yarn. The loop now needs to be pushed down towards the slipknot, and adjusted so that both the cast on loop and slipknot are the same tension and size. This now needs to be repeated until you’ve the right number of stitches according to your pattern.
- The long-tail cast – This will be a great way to start if you need to make a stretchy hem. Once the yarn is on the needle, the tail-end of the yarn is used to cast on. The end result is an edge that is stretchy, which is perfect for ribbed patterns and stockinette stitches. First step is to measure out the right length of yarn. 1 inch for every stitch in the pattern will be ideal. This will be the length of the tail. Attach the yarn by using a slipknot. Wrap the tail around your thumb. Push the needle tip through the loop you’ve created. The tail then needs to be wrapped around the point of the needle. Now pull the tail back through the thumb loop by using the needle. Pull out your thumb and tighten the loop that’s on the needle. Push this slip down so that it’s next to the slipknot. All you need to do now is repeat until you’ve made the required number of stitches.
- The provisional cast on – With this method a chain is crocheted first and then you knit into the chain. The chain can be undone once you’ve finished knitting. There are a number of occasions that require a provisional cast on. If you’re not sure how to finish the edge of your work, if you’re not sure how long you’re going to make it, or if you’re making a few pieces and will need to attach them without a visible seam.
Casting off
Also known as binding off, this is an important step to learn, if you don’t want all your hard work to unravel. And here’s how you do it:
- The first two stitches from the left needle need to be knit onto the right needle.
- The tip of the left needle has to be pushed into the first stitch made on the right needle.
- Lift the first stitch over the second and drop it off the needle.
- Continue doing this until there are no stitches remaining on the left needle, and only one stitch on the right.
- Cut the yarn, and remember to leave about 6 inches at the end.
You might also be interested to see this in real life action here.
Here at knitnstyle.com we plan to feature more how to guides, for crochet as well as knitting, So keep us as one of your favorites, and we’ll introduce you to some new knitting stitches for beginners, as well as for those with more experience. Starting with the simple knitting stitches, we plan to move onto to more complex ones in the future.

Recent Comments